Planning a kitchen goes in a fixed order: measure the room, choose a layout, place the sink, hob and fridge, check the space around them, then fill in storage, services and lighting. Get the order wrong and you end up redesigning around a dishwasher that cannot open or a hob under a window.
The short answer: measure the room and every service; choose a layout the room can take; place the sink, hob and fridge; check the aisles and landing space; add units and appliances at real sizes; plan plumbing, electrics, extraction and lighting; test it to scale in a planner; then send one dimensioned plan to everyone who quotes.
This guide gives metric and imperial figures throughout. Where it quotes a clearance, it comes from the NKBA Kitchen Planning Guidelines, the North American industry reference that UK designers also use as a benchmark. They are recommendations, not regulations: check your own appliances and the people who will use the kitchen.
Before you start: budget, time and who does what
Budget. Kitchen prices vary too much by size, region and specification for a useful single figure, so build the budget from your own quotes. Three things move it most: whether the sink, hob and appliances stay where the pipes and cables already are; the cabinet range and worktop material; and how many appliances are integrated. Keep a contingency for what you find behind the old units.
Time. The planning takes longer than people expect: measuring, choosing a layout and getting comparable quotes usually takes weeks, and made-to-order units add a lead time before fitting can start. Fitting itself depends on how much changes: a like-for-like swap is far quicker than a kitchen that moves.
Who does what. A kitchen company or designer draws and supplies the kitchen; a fitter installs it; plumbing, electrics and gas are separate trades. In the UK, gas work must be done by a Gas Safe registered engineer, and adding new electrical circuits is notifiable building work in England, so use a registered electrician. In the US, plumbing and electrical work usually needs a permit from your local building department.
Step 1: Measure the room
Measure every wall at floor level and at worktop height, then record the ceiling height and the position of every door, window and service.
- Walls: measure each wall at floor level and again at about 900 mm (36 in), where the worktop will sit. Walls are rarely straight, and the smaller figure is the one that matters.
- Height: floor to ceiling in more than one place, and the height of window sills, since a worktop meets the sill.
- Openings: the position and width of every door and window, and which way each door swings.
- Services: the water supply and stopcock, the waste pipe, the gas supply, the boiler or water heater, sockets, the consumer unit (electrical panel) and radiators.
Our kitchen measurement checklist lists every dimension a fitter will ask for, and the room measurement guide covers awkward walls.
Draw your room with your measurements →
Step 2: Choose a layout that suits the room
Pick the layout your walls and doorways allow: single-wall, galley, L-shaped, U-shaped or a kitchen with an island.
Doorways and windows usually decide it: each doorway breaks a run, and a door in the middle of a wall leaves two short runs instead of one long one. Each example below is an editable plan with a guide to its dimensions.
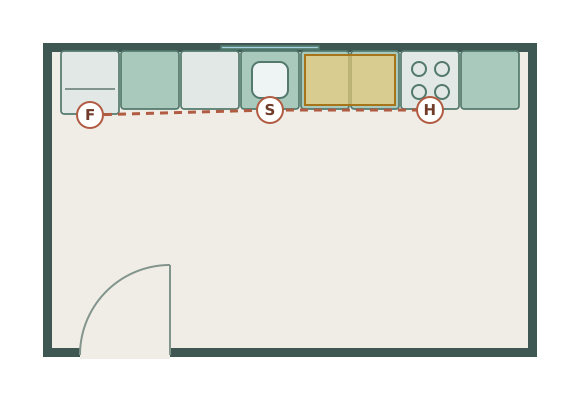
Single-wall
Example room 4.8 × 3.0 m
One long run against one wall. Suits open-plan rooms and narrow spaces where the other walls are needed for doors or seating.
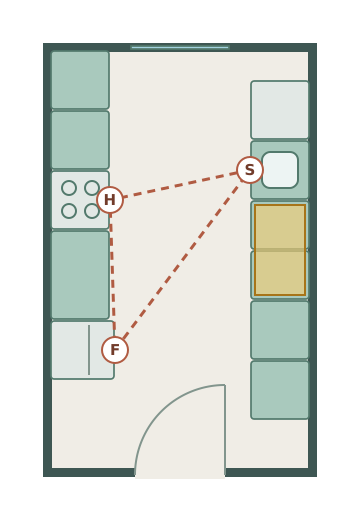
Galley
Example room 2.6 × 4.2 m
Two facing runs with an aisle between. Efficient in a long, narrow room, as long as it is not the main route through the house.
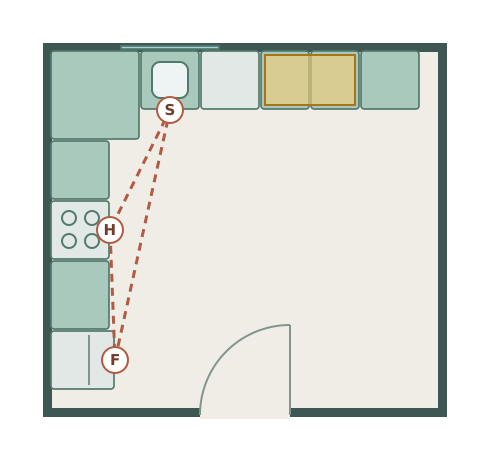
L-shaped
Example room 3.9 × 3.6 m
Two runs on adjoining walls. The most flexible layout for small and medium rooms, and it leaves space for a table.
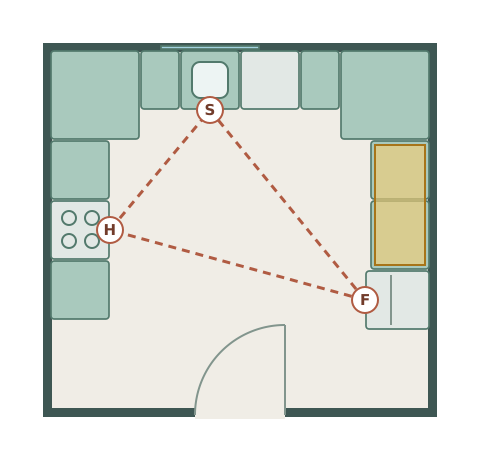
U-shaped
Example room 3.8 × 3.6 m
Runs on three walls. The most worktop and storage, but it needs width between the side runs and has two corners.
Kitchen with island
Example room 5.1 × 4.5 m
An L or U with an island in the middle. Needs a large room, because the island needs clear floor on every side.
A peninsula, a run that projects from a wall, gives the island effect in a room too narrow for a true island. Compare islands and peninsulas in our kitchen island layout guide.
Step 3: Place the sink, hob and fridge
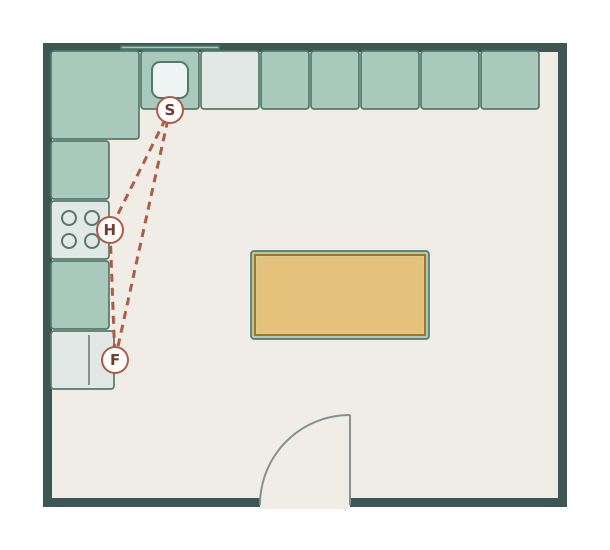
Position the three main work centres first, so that the routes between them are short and nothing blocks them.
- The work triangle. NKBA guidance suggests each leg between the sink, hob and fridge should be between 1.2 m and 2.7 m (4 to 9 ft), and the three legs together no more than 7.9 m (26 ft). No leg should cut into an island, peninsula or other obstacle by more than 305 mm (12 in), a full-height tall unit should not separate two work centres, and the main route through the room should not cross the triangle.
- Sink first. It is tied to the waste pipe, so it is the hardest of the three to move. A sink under a window is a common choice, not a rule.
- Hob with space either side. Keep it away from a doorway and away from a window with curtains or blinds, and leave landing space on both sides (step 4).
- Fridge at the end of a run. Near the door, so people can reach it without walking through the cooking area. Check which way its door opens.
A single-wall kitchen cannot form a triangle. Order the run in the sequence you work: fridge, sink, preparation space, then hob.
Step 4: Check the clearances
Check the space between runs, beside appliances and around any island before you add the rest of the units.
| Space | Metric | Imperial |
|---|---|---|
| Work aisle, one cook | 1,067 mm minimum | 42 in |
| Work aisle, two or more cooks | 1,219 mm minimum | 48 in |
| Walkway, no work area | 914 mm minimum | 36 in |
| Landing space beside the sink | 610 mm one side, 457 mm the other | 24 in / 18 in |
| Landing space beside the hob | 305 mm one side, 381 mm the other | 12 in / 15 in |
| Landing space by the fridge (handle side) | 381 mm | 15 in |
| Preparation area next to the sink | 914 mm wide × 610 mm deep | 36 × 24 in |
| Dishwasher | Within 914 mm of the sink, with 533 mm standing space beside it | 36 in / 21 in |
Source: NKBA Kitchen Planning Guidelines, the guidelines on work centres, aisles, landing areas and the dishwasher. A work aisle is the space in front of the sink, hob and fridge; a walkway is a route with no work area.
Islands need an aisle on every side. Use the work-aisle figure where the island faces a working run and the walkway figure on sides that people only walk past. If stools go at the island, NKBA suggests 813 mm (32 in) from the counter edge to a wall behind the diners where nobody passes, and 1,118 mm (44 in) where people walk behind them. Test door swings too: an open dishwasher, oven or fridge door should not block the main route or another appliance.
Step 5: Plan storage and appliances
Fill the runs with units and appliances at their real sizes, with storage next to where each thing is used.
Standard sizes make this straightforward. UK base units are 600 mm deep on a 720 mm carcass, giving a worktop at about 900 mm; US base cabinets are 24 in deep and 34.5 in high, giving a 36 in counter. Most UK appliances are 600 mm wide; US ranges are usually 30 in. Our kitchen unit and appliance size table has the full list in both systems.
- Put drawers for pans next to the hob, plates near the dishwasher, and food storage near the fridge and preparation area.
- Deep drawers in base units are easier to use than cupboards with shelves.
- Corner units lose space whichever way you fill them, so avoid more corners than the layout needs.
- Tall units (larder, oven housing, fridge housing) work best at the end of a run, where they do not cut a worktop in two.
- Decide on integrated or freestanding appliances before you choose units, because integrated appliances need matching housings.
Step 6: Plan services, ventilation and lighting
Mark where water, waste, gas, electrics and extraction need to be, because moving them is where kitchen budgets grow.
- Water and waste: the sink and dishwasher need a waste pipe with a fall. Moving the sink a long way from the existing waste is the change most likely to add cost.
- Cooking: a gas hob needs a gas supply; an induction hob usually needs its own electrical circuit. Decide before the electrician's first visit.
- Extraction: in England, Approved Document F asks for intermittent kitchen extraction of 30 litres per second from a cooker hood, or 60 l/s from a fan elsewhere in the room. A hood that ducts outside needs a route through an outside wall or the ceiling, so plan it with the units.
- Sockets: plan more worktop sockets than you think you need, away from the sink and hob. In the US, the National Electrical Code requires countertop receptacles so that no point along the wall is more than 24 in from one, with GFCI protection.
- Lighting: overhead lights cast your shadow on the worktop. Add task lighting under the wall units or above the island, and decide where the switches go.
Approved Document F is on GOV.UK; ask your electrician or local building department about the rules where you live.
Step 7: Test the plan in 2D and 3D
Draw the kitchen to scale in a planner and walk through cooking a meal, unloading shopping and emptying the dishwasher.
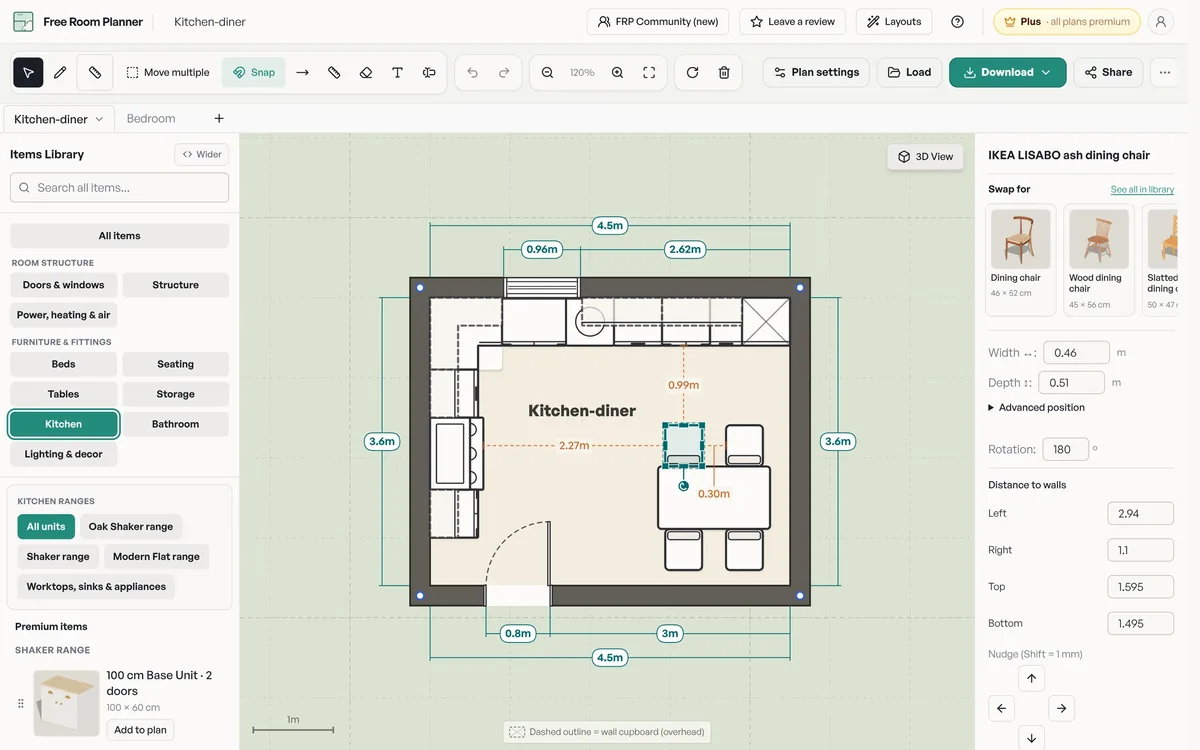
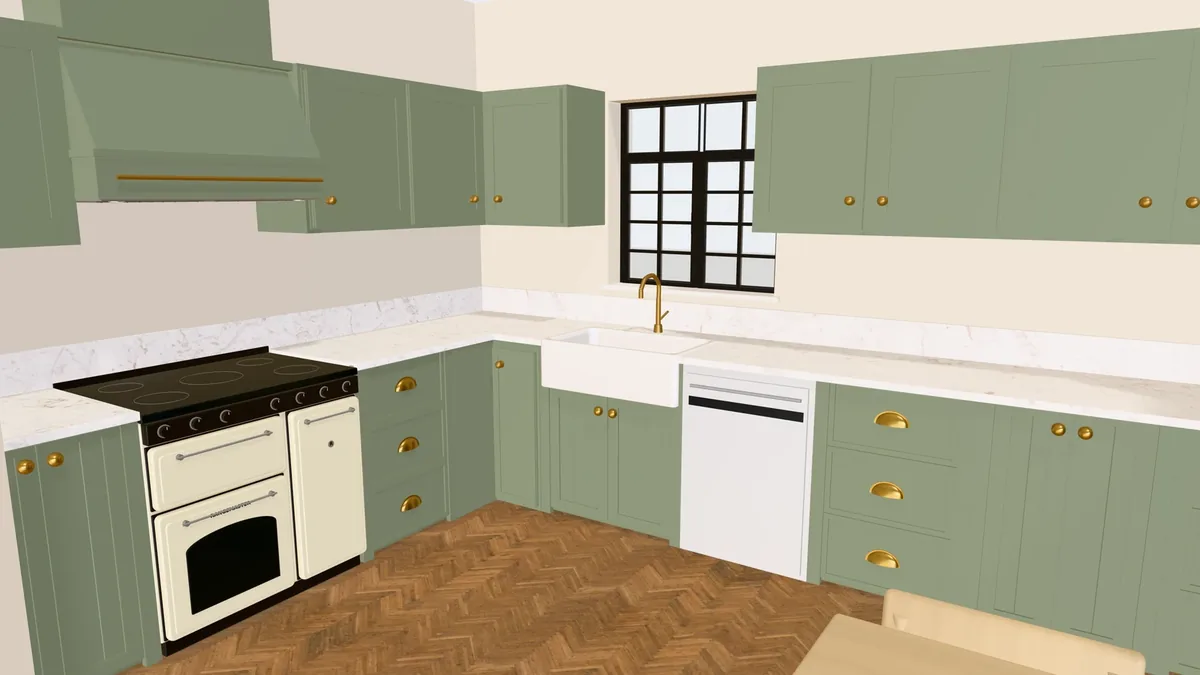
Draw the room from your step 1 measurements, start from the closest layout and change it unit by unit. Then check it the way you will use it: open the dishwasher and oven doors on the plan, put a person at the sink and another at the hob, and walk from the fridge to the preparation area. Switch to the 3D view to see how the wall units, window and extractor sit together.
Need cabinet-level detail?
Plus adds real kitchen ranges, worktops, wall tiles, floors and paint, clearance checks for door swings and scaled PDF drawings for your fitter. $11 / £9 / €9.50 a month, tax included.
Step 8: Brief your fitter or kitchen company
Send the same dimensioned plan, appliance list and photos to everyone you ask to quote.
- The plan as an image or PDF, with the room dimensions on every wall.
- A list of appliances with their model numbers, because each one has its own installation dimensions.
- Photos of the existing services: the stopcock, waste, gas meter, consumer unit and boiler.
- Your must-haves and nice-to-haves, so each quote prices the same scope.
When every company quotes against the same drawing, you can compare prices line by line. Ask each to point out anything in the plan they would change, and why.
Common kitchen planning mistakes
- Measuring once. Walls are rarely square or plumb. Measure each wall at two heights and use the smaller figure.
- Forgetting door swings. A dishwasher that opens into the oven door, or a fridge door that hits the wall, only shows up when you draw them open.
- No landing space by the fridge or hob. Somewhere to put a hot pan down is not optional.
- An island too big for the room. An island with narrow aisles makes the whole kitchen harder to use. Check the aisles first, then size the island.
- Moving the sink without pricing it. It may be the right decision, but get the plumbing priced before you commit.
- Too few sockets. Count the appliances that will live on the worktop, then add more.
- Choosing finishes before the layout. Layout decisions cost more to change later than door colours do.
Frequently asked questions
What is the first step in planning a kitchen?
Measure the room. Record every wall length at floor level and at worktop height, the ceiling height, and the positions of doors, windows, the water supply, waste pipe, gas, sockets and radiators. Every later decision depends on those numbers.
What is the kitchen work triangle?
The work triangle joins the sink, the hob and the fridge. NKBA guidance suggests each leg should be between 1.2 m and 2.7 m (4 to 9 ft) and the three legs together no more than 7.9 m (26 ft), with no leg cutting into an island or peninsula by more than 305 mm (12 in).
What is the best layout for a small kitchen?
It depends on the room's shape. A narrow room usually suits a single-wall or galley kitchen; a squarer small room often works best as an L-shape, which keeps one corner and the middle of the floor free.
How much space do you need for a kitchen island?
Allow the island itself plus a clear aisle on every side. NKBA guidance suggests at least 1,067 mm (42 in) where one person cooks and 1,219 mm (48 in) where two or more do, and at least 914 mm (36 in) on sides that are only walked past.
Can I plan a kitchen myself for free?
Yes. Measure the room, then draw it to scale in a free planner such as Free Room Planner, which has five furnished kitchen layouts to start from. You can test layouts in 2D and 3D and export the plan to send to fitters.
Related kitchen planning guides
- Free kitchen planner: start from a furnished layout
- Galley kitchen layout, L-shaped kitchen layout, U-shaped kitchen layout, kitchen with island and single-wall kitchen
- Will a kitchen island fit? Dimensions and layout guide
- Kitchen cabinet measurements checklist
- Kitchen island dimensions and American fridge freezer dimensions
- Standard kitchen cabinet sizes, kitchen worktop height and depth and the work triangle and kitchen clearances
- Comparing retailer tools? IKEA kitchen planner alternative and Howdens kitchen planner alternative
- Planning a kitchen extension and the house renovation planner