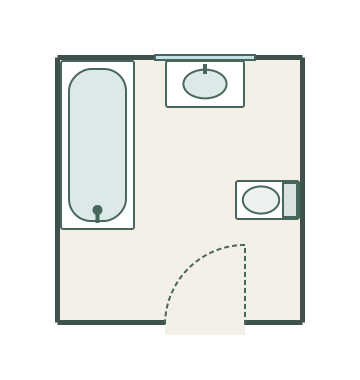
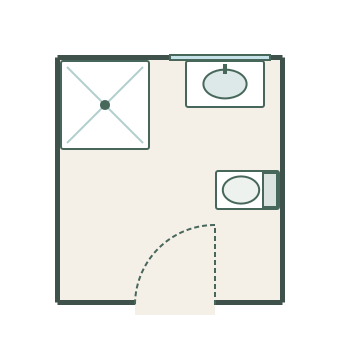
The bathroom planner is a free online tool for designing your bathroom layout in minutes. Drag and drop fixtures, check dimensions, and share your plan — completely free, no download required.
No steep learning curve. No subscription. Just a fast, accurate bathroom layout planner that lets you get on with designing.
Place baths, showers, toilets, basins, and storage units with a single click. Snap to walls and other fixtures automatically.
Set your exact room size in millimetres and every fixture is drawn to scale. See instantly what fits before you buy anything.
Open the bathroom planner and start designing immediately. Nothing to install, no account to create, no credit card required.
Download your bathroom layout as an image to share with your fitter, architect, or retailer. No reformatting needed.
Over 30 bathroom components including baths, walk-in showers, WCs, vanity units, radiators, and more — with standard UK sizes.
Every item can be rotated, resized, and labelled. Test multiple bathroom layout ideas in minutes without making a single measurement in the real room.
Enter your bathroom dimensions in millimetres to create an accurate to-scale floor plan.
Drag a bath, shower, toilet, and basin from the library into your room.
Move, rotate, and resize items until your layout works. Snap to walls for precision.
Download your plan or share a link directly with your bathroom fitter or supplier.
Whether you're redesigning a small en-suite or speccing out a full bathroom renovation, Free Room Planner gives you the tools to plan it properly.
Map out exactly where your new fixtures will go before your fitter arrives. Avoid costly mistakes by checking dimensions on screen rather than discovering problems on the day.
Space is tight in a small bathroom. Use our bathroom design software to try different layouts — corner shower vs bath, wall-hung vs pedestal — until you find what works.
Arrive at your bathroom design appointment with a plan already drawn up. Save time, communicate clearly, and get a more accurate quote from the outset.
Check that a bath, shower enclosure, or vanity unit actually fits your space before you order. Our bathroom planner shows you exactly how much room you have to work with.
All items are sized to standard UK dimensions. Resize freely to match your exact products.
Planning in feet and inches? The planner has a built-in m / ft toggle, so you can draw your room in US units from the first wall.
The numbers below reflect typical US guidance based on the International Residential Code (IRC). Local codes vary — many jurisdictions amend the IRC or adopt different editions — so treat these as planning defaults and confirm anything borderline with your local building department before work starts.
The 60" × 30" alcove tub — the classic 5-foot tub — is the size most US framing assumes.
| Standard alcove tub | 60" × 30" |
| Larger alcove tub | 60" × 32" |
| Freestanding tub | 67" × 32" |
| Corner tub | 48" × 48" |
32" × 32" is the code minimum; most people find 36" × 36" the practical floor for daily use.
| Minimum stall | 32" × 32" |
| Comfortable stall | 36" × 36" |
| Walk-in shower | 48" × 36" |
| Neo-angle corner | 38" × 38" |
The 12" rough-in — the distance from the wall to the drain center — is the US standard. Measure yours before buying a replacement toilet.
| Two-piece toilet depth | ~28–30" |
| Two-piece toilet width | 15–16" |
| Standard rough-in | 12" |
Vanities come in stock widths; depth and height are far more uniform across brands.
| Vanity widths | 24", 30", 36", 48" |
| Double vanity | 60" |
| Standard depth | 21" |
| Vanity height | 32–36" |
| Pedestal sink | ~22–24" wide |
The code minimums keep a bathroom legal; the comfortable numbers keep it pleasant. Check both on your plan.
The minimum from the toilet centerline to any side wall or fixture. Many designers recommend 18" or more, and 21" feels genuinely comfortable.
The minimum clear space in front of a toilet, sink or tub. 30" is the comfortable standard — the difference between squeezing past and simply walking past.
The minimum shower interior, measured at the showerhead height. Leave 24" of clear space in front of the shower entry so the door or opening is actually usable.
A standard US interior door needs its full swing kept clear — often the biggest space consumer in a small bath. Pocket or barn doors buy the space back.
GFCI-protected outlets are required in bathrooms, with a receptacle within 36" of the sink — and no outlets in or above the tub or shower zone. Ventilation means an exhaust fan (commonly ~50 CFM) or an operable window. Typical IRC/NEC-based guidance, not legal advice.
Flip the planner’s unit toggle to ft and every wall, fixture and gap reads in feet and inches — so you can check these clearances on screen before you commit.
Plan in feet and inches — open the planner →Every fixture below exists in the planner’s library at these exact dimensions — so what you place on screen is what arrives on the van.
Most bathroom planning problems start with guessed dimensions. The average UK bathroom is only around 4–5 square metres, and at that size a 100mm error is the difference between a shower door that opens and one that hits the basin. The good news is that UK sanitaryware is more standardised than the brochures suggest: baths, trays, WCs and basins cluster around a handful of common footprints. Sketch your room with the standard sizes first, confirm the layout actually works, and only then match items to specific products — resizing a fixture in the planner takes seconds.
1700 × 700mm is the UK standard — the size most fitters assume unless you tell them otherwise.
| Standard bath | 1700 × 700 mm |
| Larger bath | 1800 × 800 mm |
| Corner bath | 1200 × 1200 mm |
| Freestanding bath | 1700 × 800 mm |
| P-shape shower bath | 1700 × 800 mm |
Trays and enclosures come in fixed sizes — pick the tray first and the layout follows. 800 × 800mm quadrants are also common where space is tight.
| Shower enclosure | 900 × 900 mm |
| Corner / quadrant | 900 × 900 mm |
| Walk-in shower | 1200 × 900 mm |
| Shower screen | 800 mm wide |
| Linear drain | 800 mm |
Footprints run from the wall to the front of the pan. Wall-hung and back-to-wall models hide the cistern inside the wall or a furniture unit.
| Close-coupled WC | 400 × 650 mm |
| Wall-hung WC | 360 × 520 mm |
| Back-to-wall WC | 360 × 560 mm |
Width is the headline number; depth decides how far the basin juts into your walkway.
| Pedestal basin | 600 × 450 mm |
| Wall-hung basin | 600 × 450 mm |
| Cloakroom basin | from 400 mm wide |
| Single vanity | 800 × 480 mm |
| Double vanity | 1200 × 480 mm |
The supporting cast — easy to forget on the plan, annoying to squeeze in later.
| Bidet | 400 × 600 mm |
| Towel radiator | 600 mm wide |
| Storage unit | 900 × 500 mm |
Drag any of these items from the library and it lands in your room at exactly the size shown here. Found the specific product you want to buy? Select the item and type in the manufacturer’s dimensions to match it precisely.
Open the fixture library in the planner →A bathroom that fits on paper can still fail in person. Fixtures need activity space — room to stand at the basin, climb out of the bath, open the shower door — and it’s the gaps between items, not the items themselves, that decide whether a layout works. The most common bathroom planning mistakes are clearance problems: a WC that technically fits but leaves no knee room, or a shower door that swings into the basin. Check these distances on your plan before you commit to anything.
Leave around 600mm of clear space in front of the pan — 700mm feels genuinely comfortable — plus roughly 200mm from the centre of the pan to any side wall or neighbouring fixture. Tighter than that and the WC is usable but never pleasant.
You lean forward at a basin, so allow about 700mm in front of it. Rim height is typically 780–800mm from the floor — worth noting if you’re wall-hanging a basin and get to choose the height yourself.
Keep around 700mm alongside the access side of the bath for getting in and out safely, and for drying off afterwards. The other long side can sit tight against the wall — that’s the standard UK arrangement.
Allow about 700mm of clear entry space in front of the door or opening. Hinged doors need their full swing on top of that; in a tight room, a sliding or bi-fold door buys the space back.
A standard UK internal door sweeps an arc of roughly 800mm — often the single biggest consumer of floor space in a small bathroom. If the swing collides with your layout, consider re-hanging the door to open outward, or fitting a sliding or pocket door.
Because the planner draws everything to scale, you can measure these gaps directly on your plan. If there’s 700mm between the bath and the vanity on screen, there’s 700mm in real life.
Check your clearances in the planner →Bathrooms sit at the crossing point of water, electricity and drainage, so several parts of the UK building regulations touch them. The notes below reflect typical current UK guidance — enough to plan intelligently and ask the right questions, not a substitute for professional advice.
Every bathroom needs an openable window or an extractor fan. Current UK guidance commonly calls for intermittent extract of around 15 litres per second for a bathroom, and 6 l/s for a WC-only cloakroom. Fans should vent to the outside — not into the loft.
Bathrooms are divided into zones. Zone 0 — inside the bath or shower tray — allows only low-voltage 12V fittings rated IPX7. Zone 1 extends up to 2.25m above the bath or tray and needs at least IPX4; Zone 2 covers a further 600mm beyond that, also IPX4. Standard sockets are generally kept around 3m from the bath (shaver units are the exception). Electrical work in bathrooms is notifiable under Part P — use a qualified electrician.
Hot water supply, sanitation and drainage fall under Part G of the building regulations. In practice your plumber handles this, but it’s the reason waste pipes need proper falls and why some jobs involve building control sign-off.
For new builds, guidance on providing an accessible WC at entrance level comes under Part M. It rarely affects a like-for-like refit, but it’s relevant if you’re adding a downstairs cloakroom as part of a larger project.
Requirements vary with the job and the property, so treat the above as orientation rather than a checklist — confirm anything structural, electrical or drainage-related with building control or a qualified trade before work starts.
There’s no single correct bathroom layout — but nearly every UK bathroom is a variation on one of six patterns. Find the one closest to your room, then bend it to fit. Each takes about two minutes to set up in the planner, which is exactly the point: try three versions on screen instead of regretting one in tile.
When the whole room is under six square metres, the bath-versus-shower question decides everything. A shower over a standard 1700mm bath keeps both options open; if you can let the bath go, an 800mm quadrant in the corner frees a remarkable amount of floor. Go wall-hung for the WC and basin — the unbroken floor makes the room read bigger, and cleaning gets easier. Then deal with the door: an inward swing can eat a fifth of the floor area, so a sliding or outward-opening door is often the single best change you can make. For a worked example, see our small bathroom layout ideas for a 6×8 room.
Open this layout in the planner →Most en-suites are carved out of a bedroom, which means the plumbing wall is usually decided for you — plan around it rather than against it. A 900mm quadrant or a 1200 × 900mm walk-in, a compact 400mm cloakroom basin and a wall-hung WC will fit a footprint of roughly 1.5 × 2m. Noise matters more here than in any other bathroom: the room shares a wall with the bed, so quiet-flush WCs and decent fittings pay for themselves nightly. And ventilation is non-negotiable — a good extractor is what stops the steam ending up in the bedroom.
Open this layout in the planner →A workable downstairs loo fits in about 800 × 1400mm: a 400mm cloakroom basin beside or opposite the WC, with 600mm of activity space in front of the pan. Corner basins and short-projection WCs exist precisely for this room, and wall-hung fittings earn their keep here more than anywhere. Check the door swing before anything else — in a space this size, the door is the layout, and an outward-opening door is usually the answer.
Open this layout in the planner →A wet room replaces the shower tray with a tanked, level-access floor falling to a linear drain — the whole room becomes the shower. It’s the most accessible layout there is, it suits square rooms beautifully, and with a single 800mm screen you can keep the WC and basin dry in daily use. But it needs specialist waterproofing and a properly designed gradient, so this is one to plan with a professional. Remember too that most of the room now counts as electrical Zone 1 or 2 — light fittings need the right IP rating, and ventilation matters double, because there’s no enclosure holding the steam.
Open this layout in the planner →From about 3.5m² you can stop choosing between a bath and a separate shower and have both — a 1700 × 700mm bath along one wall and a 900mm enclosure in the corner. That combination is the classic family arrangement: baths for small children, a proper shower for everyone else. If mornings are the bottleneck, a 1200mm double vanity does more for household harmony than any other single purchase. Keep the WC out of the direct sightline from the door if the room allows it.
Open this layout in the planner →Very common in terraced houses, where the bathroom is often a slice off the back of the house. Run the fixtures in a line along one wall — WC, basin, then the bath or shower at the far end — and keep a clear walkway of at least 700mm alongside the run. Concentrating everything on one wall also concentrates the plumbing, which keeps the pipework short and the labour bill down. Our small bathroom layout planner guide walks through this pattern step by step.
Open this layout in the planner →The plan on screen is the cheap part of a bathroom. These four decisions are the ones worth settling before anyone quotes — they’re where the money actually moves.
The soil stack — the large vertical waste pipe, usually boxed into a corner or running down an outside wall — is the least movable thing in the room, and the WC wants to stay near it. Moving a WC means new waste pipework laid at a 1:40 fall, possibly lifted floors, and real labour cost. So before you fall for a layout that puts the WC across the room, exhaust every arrangement that keeps it where it is. Most bathrooms have a better layout hiding in them that never touches the stack.
A like-for-like refit — new fixtures in the old positions — is the cheapest bathroom you can buy, because the first-fix plumbing already exists. Every fixture you relocate adds pipework, floor lifting and days on site. That doesn’t make moving things wrong; it makes it a decision to price deliberately rather than discover on the invoice. Draw both versions in the planner and hand your fitter the two plans — pricing the difference takes them minutes, and you’ll know exactly what the new layout really costs.
Before you draw anything, walk the room with a tape measure and note six things: the room dimensions wall to wall; the door position and which way it swings; the window position; where the soil stack is; where the existing hot, cold and waste runs go; and the radiator or towel rail position. Ten minutes of measuring is the difference between a plan and a sketch — and it’s the version of the room your fitter will recognise.
A dimensioned plan changes the conversation. Instead of describing what you want, you hand over a drawing: exact room size, fixture positions, sizes marked. Every fitter quotes against the same document, so the quotes are finally comparable — and there’s no “I assumed you meant…” halfway through the job. Export your layout as an image from the planner and attach it to every enquiry you send.
Planning a different room? Use the planner built for it — same canvas, same free export.
Plan your kitchen layout with units, appliances, and islands.
Find the best bed position and storage configuration.
Arrange sofas, tables, and entertainment units for the perfect living space.
Draw whole-floor plans with multiple rooms, walls, doors, and windows.