TL;DR: Small rooms fail because furniture is placed by guessing, not planning. This guide walks you through measuring your room, entering dimensions into a free browser-based room planner, and testing compact room layout ideas before you move a single piece of furniture. No sign-up. No download. No cost.
You can picture roughly how you want your small room to look. The bed against that wall. The desk under the window. Maybe a wardrobe squeezed into the corner. But every time you actually try it, something feels off — the room looks cramped, the door swings into the bed, or there's barely enough space to walk through.
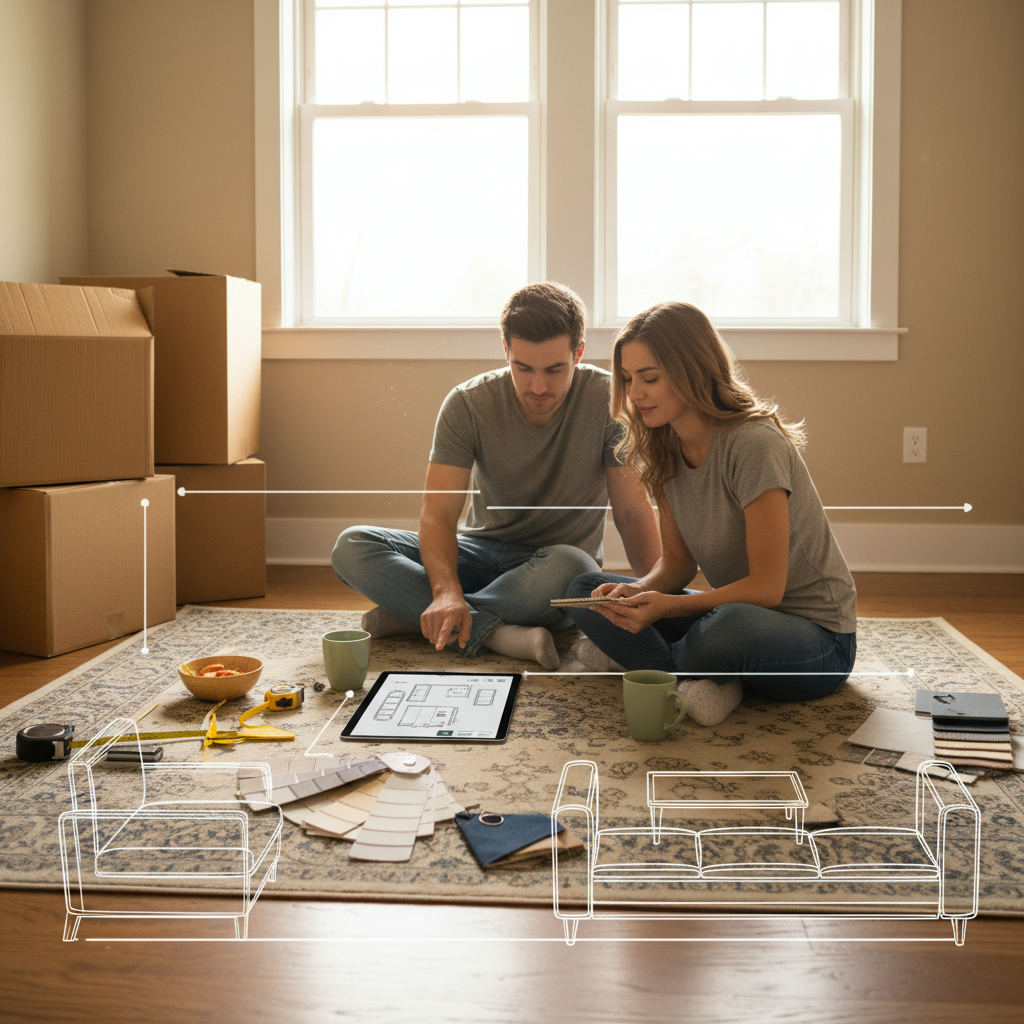
By Free Room Planner Team · Last updated: May 2026Browsing photos online helps with inspiration. It does not help you figure out whether your specific sofa fits in your specific room with your specific door in the way.
What you need is a way to test room layout ideas for small spaces before you pull a muscle rearranging furniture for the third time. That's exactly what Free Room Planner gives you — draw your room to scale, place furniture at real dimensions, and see what works before anything moves.
This guide covers everything: why small room layouts go wrong, how to measure properly, how to use the planner step by step, and practical layout ideas for bedrooms, home offices, and living rooms. Every section ends with something you can act on right now.
Why Small Room Layouts Go Wrong (And How Planning Fixes It)
Most small-space layout problems are not caused by a lack of ideas. They're caused by a lack of accurate information at the moment decisions get made.
The Most Common Small Room Layout Mistakes
These are the errors that show up again and again in compact rooms:
Oversized furniture. A bed or sofa that looked fine in the showroom dominates a small room completely. Without knowing your floor area precisely, it's almost impossible to judge scale from memory.
Blocking natural light. Placing a tall wardrobe or bookcase in front of a window kills the sense of space instantly. It's an easy mistake to make when you're arranging by eye rather than by floor plan.
Ignoring traffic flow. Every room needs clear paths between the door, the bed, and the main storage. A layout that looks balanced on paper — or in your head — can feel suffocating once you're actually moving through it.
Forgetting fixed features. Radiators, plug sockets, light switches, and built-in alcoves all constrain where furniture can go. People forget them during planning and then hit them in real life.
Symmetry for symmetry's sake. Centering furniture in a small room often wastes the usable perimeter. Asymmetric arrangements that push furniture to the walls or corners frequently open up far more floor space.
Why Guessing Furniture Placement Always Costs You
Guessing is expensive. Not just in effort — in time, in stress, and sometimes in money.
If you order a sofa that doesn't fit, you're paying return delivery fees. If a fitter arrives to install built-in wardrobes and the dimensions don't match what you agreed, you're paying for their wasted time. If you move a heavy double bed twice in a weekend and still hate the result, you've spent a Saturday on a problem a floor plan would have solved in ten minutes.
Planning your small room layout on screen — using real measurements in a snap-to-grid tool — removes guesswork entirely. You see the problem before it happens. You try five arrangements in the time it would take to move a single piece of furniture once.
How to Measure Your Small Room Before You Plan Anything
The free room planner works with your actual dimensions. That's what makes it useful rather than decorative. Before you open the tool, spend five minutes with a tape measure.
What to Measure and How to Record It
You need these measurements, written down:
- Room length and width — measure at floor level, wall to wall. If your room is not a perfect rectangle (most aren't), note each section separately.
- Door positions and swing direction — measure the width of each door frame and note which way it opens. A door that swings inward eats into usable floor space.
- Window positions and sizes — measure where each window starts from the corner wall and how wide it is.
- Fixed features — radiators, built-in alcoves, chimney breasts, and recesses all need their position and size recorded.
- Ceiling height — less critical for floor planning but useful if you're considering tall furniture or loft beds.
Use a steel tape measure rather than a fabric one — fabric tapes stretch and introduce errors. Write every measurement down immediately rather than trusting your memory between rooms.
A useful format: sketch the room outline by hand first, then fill in the numbers. It doesn't need to be beautiful. It just needs to be accurate.
How to Enter Your Room Dimensions Into the Free Room Planner
Once you have your measurements, open freeroomplanner.com in any browser. No sign-up required. No download needed.
- Start by drawing your room walls. The tool snaps to a 10cm grid, so each wall segment locks to a precise measurement as you draw.
- Enter the length of each wall using the live measurement display — you'll see the dimension update in real time as you adjust.
- Add doors and windows in their correct positions using the tool's built-in elements. Set each one to the width you measured.
- Mark any fixed features — alcoves, radiators — as blocked zones so you don't plan furniture over them.
The whole process takes under five minutes for a standard bedroom or living room. Once your room outline is accurate, every furniture decision you make inside it will be based on real data.
How to Use the Free Room Planner to Layout a Small Room
This is the core of what this guide is about. A step-by-step walkthrough of turning your measurements into a working small room floor plan — one you can test, adjust, and share.
Step 1: Draw Your Room Outline to Scale
Open the free room planner and start with the perimeter walls. Click to place each corner point. The snap-to-grid system keeps every wall straight and to scale automatically — you don't need to be precise with your mouse, just with your measurements.
For rooms with alcoves or recesses (common in older UK homes), draw the main rectangle first, then add the additional sections. The tool handles non-rectangular rooms without any special settings.
Step 2: Add Doors, Windows, and Fixed Features
This step is what separates a useful floor plan from a rough sketch. Doors that swing the wrong way, windows that block wall space, and radiators that rule out furniture positions — all of these need to be on your plan before you place a single piece of furniture.
Add each door from the element library and set it to open in the correct direction. Add windows at their correct wall positions. If you have a chimney breast or alcove, draw it as part of the wall outline rather than as a furniture element — it's a permanent feature, not a moveable object.
Step 3: Place and Arrange Furniture Using the Tool
Now the planning actually begins. Drag furniture elements from the library onto your floor plan — beds, sofas, desks, wardrobes, dining tables. Each piece comes with standard dimensions, and you can resize them to match what you actually own.
This is where the before-and-after difference becomes visible. Before using the planner: a small double bedroom with the bed centred on one wall, a wardrobe on the opposite wall, and barely 60cm (24in) of walking space on either side. After spending ten minutes in the planner: the bed shifted to the corner with the headboard against the longer wall, the wardrobe moved to the alcove beside the chimney breast, and a clear 90cm (35in) path from door to window. Same furniture. Same room. Completely different feel.
Try multiple configurations before settling on one. It costs nothing to test five arrangements on screen.
Step 4: Check Walkway Clearance and Traffic Flow
Once furniture is placed, check that your layout meets basic clearance standards:
- Main walkways should be at least 90cm (35in) wide — enough for two people to pass.
- Bedside clearance should be at least 60cm (24in) on the side you get out from.
- Desk chair clearance needs roughly 75cm (30in) behind the chair when pushed out.
- Wardrobe doors need their full swing depth in front of them — typically 50–60cm (20–24in).
In the planner, you can visually check these distances using the grid. Each grid square represents 10cm (4in), so counting squares gives you instant measurements.
Step 5: Save and Export Your Layout Plan
When you're happy with the arrangement, export your floor plan as a clean PNG image. This gives you:
- A reference to come back to when furniture shopping (you know the exact dimensions you need).
- A clear briefing document to share with a fitter, contractor, or interior designer.
- A record of the layout in case you want to revisit alternative arrangements later.
No account needed to export. No watermark. Just your floor plan, ready to use.
Small Bedroom Layout Ideas You Can Plan Right Now
The bedroom is where most small-space planning frustration lives. There's almost always a bed that feels too big, not enough storage, and never quite enough floor space. These configurations work — and you can test each one in the bedroom layout planner in under ten minutes.
Single Bed Room Layouts That Get More From the Floor
For single beds in box rooms or small spare rooms, the instinct is to centre the bed on one wall. That's often the wrong call.
Pushing the single bed into a corner — headboard against one wall, side against the adjacent wall — immediately frees up the entire remaining floor area. You lose access from one side, but in a room this size, you gain far more usable space than you give up.
With the bed in the corner, you can typically fit a full-width wardrobe on the opposite wall plus a compact desk under the window — a layout that would be impossible with the bed centred.
Small Double Bedroom Arrangements That Actually Work
Double beds in small rooms demand more careful planning. The common mistake is placing the bed against the longest wall with equal clearance on both sides. This often leaves you with 45cm (18in) gaps — not enough to walk through comfortably, and too narrow to open a wardrobe door.
A more efficient arrangement: headboard against the wall opposite the door, bed positioned slightly off-centre toward one wall, leaving a wider clearance on the main access side. This gives you a proper walkway of 75cm (30in) or more on one side and allows a bedside table on the tighter side.
Always check the door swing first. A door that opens into the side of a bed is a layout failure that shows up immediately in the planner — and costs nothing to fix at the planning stage.
Adding a Desk or Wardrobe Without Losing Space
The desk-in-a-bedroom challenge is real. You need the desk to face a wall (so you're not staring at the room), the chair needs clearance behind it, and the wardrobe still needs to fit somewhere.
Three configurations worth testing in the bedroom layout planner online:
- Desk under the window — the most efficient use of natural light and wall space. Check that the window doesn't block head height at the seated position.
- Desk in the alcove — if your room has a chimney breast, the alcoves on either side are natural desk positions. The wardrobe goes in the other alcove.
- Corner desk setup — an L-shaped or corner desk uses dead corner space and keeps the main floor area clear. These work particularly well in rooms between 9 and 12 square metres.
Small Home Office Layout Ideas for Compact Rooms
The home office is increasingly being squeezed into rooms that weren't designed for it — spare bedrooms, box rooms, landings, or shared spaces. Planning before committing is critical, because a poorly arranged compact office is actively uncomfortable to work in for eight hours.
For a deeper guide specifically on this topic, the How to Plan a Home Office Layout guide covers a full six-step process including storage planning and lighting.
Fitting a Home Office Into a Small Bedroom or Box Room
The smallest workable home office needs:
- A desk surface of at least 100cm wide by 55cm deep (39in by 22in)
- Chair clearance of 75cm (30in) directly behind the desk
- Some form of storage — shelving above the desk, a small pedestal, or a shallow cabinet
In a box room of roughly 2.5m by 2m (8ft by 6.5ft), this is achievable — but only if you plan the layout precisely. A floating desk mounted to the wall removes the need for desk legs and saves 5–10cm (2–4in) of floor depth. Add wall-mounted shelving above and you've built a functional workspace without touching the floor area at all.
Use the home office layout planner to test this setup before buying any furniture. A wall-mounted desk that's 5cm too deep makes the room uncomfortable. Getting it right on screen costs nothing.
Dual-Purpose Room Layouts: Office and Guest Room Combined
This is one of the most requested small-room configurations — a room that functions as a home office Monday to Friday and a guest bedroom at weekends.
The key is separating the zones clearly even in a small space:
- Zone one: work area — desk, chair, storage. Positioned near natural light if possible.
- Zone two: sleeping area — a sofa bed or day bed, positioned against the longest available wall.
A room of 3m by 3.5m (10ft by 11.5ft) can accommodate both zones if the furniture is chosen carefully and the layout is planned properly. The planner lets you test whether the sofa bed opens fully without hitting the desk chair — a clearance problem that's easy to miss and expensive to discover after delivery.
Small Living Room Layout Ideas That Open Up the Space
Small living rooms suffer from two opposite errors: furniture pushed flat against every wall (which creates a strange, echoing feel) or furniture crowded into the centre (which blocks movement entirely). Neither works.
Sofa and Seating Arrangements for Narrow Living Rooms
In a narrow living room — typically under 3m (10ft) wide — a single sofa on the longest wall almost always outperforms an L-shaped arrangement. The L-shape eats floor space and makes the room feel enclosed.
Position the sofa perpendicular to the longest wall if the room allows it — this creates a natural divider between the seating area and the rest of the space without physically blocking anything.
Keep at least 45cm (18in) between the sofa and the coffee table, and at least 90cm (35in) between the sofa and the opposite wall or TV unit. These are the clearances that make a small living room feel considered rather than cramped.
Use the free furniture arrangement tool to test different sofa positions before you decide. Moving a sofa is genuinely hard work. Moving it on screen takes three seconds.
How to Create Zones in a Small Open-Plan Space
Open-plan rooms that combine living and dining — or living and kitchen — need clear zones to feel ordered rather than chaotic. In a small space, you create zones through furniture placement rather than walls.
A rug under the seating area defines the living zone visually without taking up any additional space. A dining table positioned near the kitchen end of the room creates a natural transition. Even a 30cm (12in) gap between the back of the sofa and the dining chairs signals a zone boundary.
For rooms that combine kitchen and living areas, the open-plan kitchen living room layout guide covers zoning strategies in more detail.
Multi-Use Small Room Layouts: Planning Rooms That Do Two Jobs
The reality of small-space living is that rooms rarely get to do just one thing. A dining room that's also a homework space. A living room with a sofa bed for guests. A bedroom that doubles as a home office.
The mistake most people make with multi-use rooms is trying to make both functions coexist at the same time rather than planning for a clean transition between them.
Consider what the room needs to do during peak hours. A desk in a bedroom is fine if it's out of your sightline from the bed — facing a wall rather than positioned where you see it when you wake up. A sofa bed in an office works if it opens without requiring you to move everything else first.
Draw both configurations in the planner — the room set up for function A, and then set up for function B. Check that the transition between them is physically possible in the actual space. If shifting from office mode to guest room mode requires moving four pieces of furniture, the layout needs rethinking.
This kind of dual-configuration planning is where a small room floor plan tool earns its value most clearly. You can't easily test both configurations by moving real furniture back and forth. You can do it in five minutes on screen.
How to Share Your Small Room Layout With a Contractor or Designer
Once your layout is finalised, the exported floor plan becomes a practical briefing document.
Contractors and fitters work from instructions. A vague description — "I want the wardrobe roughly there and the desk near the window" — leads to a vague result, or worse, an expensive mistake that has to be undone. A clean floor plan with dimensions removes that ambiguity entirely.
When you export from the free room planner, you get a PNG image that shows your room to scale, with furniture placed and dimensions visible. You can send this by email, WhatsApp, or attach it to a quote request. The fitter sees exactly what you mean. There's no room for misinterpretation.
This matters even more for fitted furniture — built-in wardrobes, bespoke shelving, kitchen units. If the measurements are wrong in the brief, they're wrong in the build. A floor plan from a snap-to-grid tool is far more reliable than a hand-drawn sketch or a verbal description.
For kitchen-specific layout planning, the guide on how to plan a kitchen renovation covers this briefing process in detail, including what to include when communicating with kitchen fitters.
Frequently Asked Questions About Small Room Layout Planning
What is the best furniture arrangement for a small room?
The best arrangement for a small room pushes the largest piece of furniture — usually a bed or sofa — against the longest wall, leaving the central floor area as clear as possible. Keep at least 90cm (35in) of walkway clearance from the door to the main activity area, and check that every door and drawer can open fully without being blocked by another piece of furniture.
How do I plan a room layout for free online?
Open freeroomplanner.com in any browser — no sign-up or download needed. Draw your room outline using your measured wall dimensions, add doors and windows, then drag furniture elements onto the plan to test different arrangements. The snap-to-grid system keeps everything to scale, and you can export your finished floor plan as a PNG image to save or share.
What is the minimum space needed between furniture in a small room?
For main walkways, the minimum comfortable clearance is 90cm (35in). Beside a bed, allow at least 60cm (24in) on the side you exit from. In front of wardrobes or chest of drawers, leave the full door or drawer depth plus 30cm (12in) of standing space. Desk chair clearance behind a seated position should be at least 75cm (30in). These minimums apply regardless of room size.
Can I plan a small bedroom layout without measuring?
You can sketch ideas without measuring, but the result won't be reliable enough to act on. If you order furniture based on an unmeasured layout plan, there's a real risk it won't fit or won't leave adequate clearance. Taking wall, door, and window measurements before you start — even rough ones with a tape measure — takes under ten minutes and makes every subsequent decision accurate rather than approximate.
How do I make a small room look bigger with furniture placement?
Furniture placement affects perceived space significantly. Keeping the floor visible by choosing raised-leg furniture, pushing large pieces to the walls rather than floating them in the centre, and ensuring natural light reaches the middle of the room all make a small space feel larger. Avoid placing tall furniture directly in front of windows, and keep the path from the door to the main window unobstructed where possible.
Is there a free tool to plan room layouts without signing up?
Yes. freeroomplanner.com is a browser-based room planner that requires no sign-up, no account, and no payment. It works on desktop and mobile, uses snap-to-grid accuracy, and lets you export your floor plan as an image. There are room-specific planners for bedrooms, living rooms, kitchens, bathrooms, and home offices — all free, all accessible immediately without any registration.
Start Planning Your Small Room Layout — Free, Right Now
Small rooms are not the problem. Poor planning is.
Every layout challenge covered in this guide — oversized furniture, blocked light, awkward traffic flow, dual-purpose rooms that feel like neither — has a practical solution. And every solution is faster to find when you're working with a scale floor plan rather than a guess.
Open the free room planner now. No sign-up. No download. No cost. Works in any browser on any device.
Here's what to do next:
- Grab a tape measure and spend five minutes noting your wall lengths, door positions, and window locations.
- Open the planner and draw your room outline using those measurements.
- Add your furniture and test at least three different arrangements before settling on one.
- Export your floor plan and save it — or send it directly to a contractor, fitter, or designer.
If you're planning a bedroom specifically, the bedroom layout planner is ready to go. For a compact home office setup, the home office layout planner walks you through the same process with workspace-specific furniture options.
And if you're dealing with an open-plan space or connected rooms, the furniture arrangement tool handles multi-room layouts with the same snap-to-grid accuracy.
Plan it on screen first. Then move the furniture once — into exactly the right place.