TL;DR: Accurate floor plans prevent costly miscommunication with contractors and stop furniture from ending up in the wrong place. This guide walks you through every stage — from measuring your room correctly to exporting a finished, shareable layout — using Free Room Planner, a free browser tool that requires no sign-up or download. Most homeowners finish their first floor plan in under 20 minutes.
You described the room perfectly. You even sketched it on a notepad. But somewhere between that conversation and the contractor's quote, a wall ended up in the wrong place — or the kitchen island turned out to block the door to the hallway.
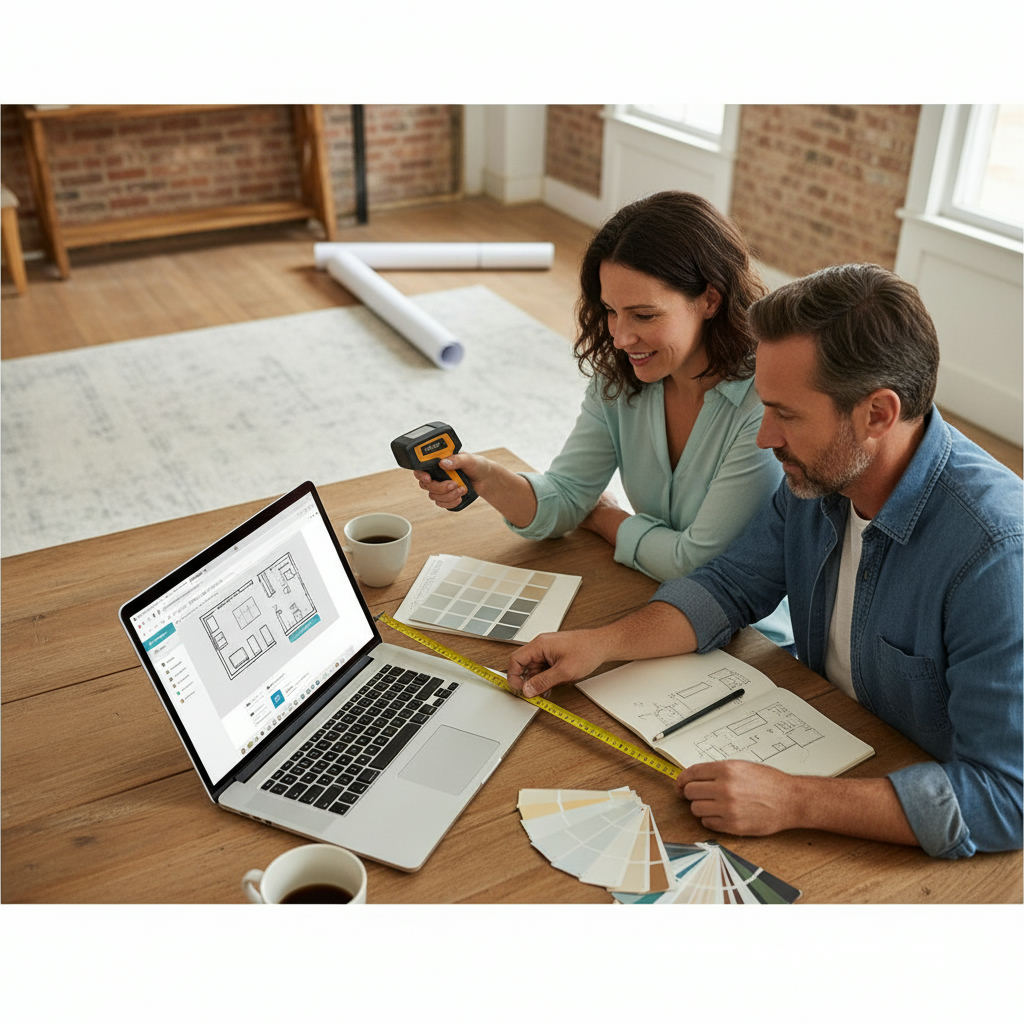
By Free Room Planner Team · Last updated: May 2026It happens constantly. And almost every time, the fix is the same: one accurate floor plan, drawn to scale, showing exactly where everything sits.
Learning how to draw floor plans accurately used to mean buying expensive software or hiring someone to do it for you. That's no longer true. With a free 2D floor plan creator like Free Room Planner, you can go from blank canvas to a dimensioned, shareable layout in the time it takes to drink a coffee — no downloads, no subscription, no technical background needed.
This guide covers everything: why accuracy matters, how to measure your room correctly, a step-by-step walkthrough of the digital drawing process, and the floor plan mistakes to avoid before you send anything to a contractor or designer.
Why Floor Plan Accuracy Actually Matters
A floor plan isn't just a picture of a room. It's a communication tool. When you hand one to a contractor, fitter, or designer, they make decisions based on it — ordering materials, pricing labour, planning installation sequences.
If the measurements are off by even 10cm (4in), those decisions can go wrong in ways that cost real money.
The Most Frequent Floor Plan Errors Homeowners Make
Most floor plan mistakes don't come from carelessness. They come from not knowing what to measure, or measuring in the wrong order.
The errors that show up most often:
- Measuring to the wrong surface. You measure wall-to-wall, but forget to account for skirting boards, which can add 1–2cm (about half an inch) to the actual clearance available.
- Ignoring door swing. A door that opens into a room needs clearance. Forget that, and your furniture plan falls apart the moment someone opens the bathroom door.
- Missing fixed features. Radiators, electrical sockets, and plumbing points all constrain where furniture and fixtures can actually go. Leave them off the plan, and you'll find out about them the hard way.
- Sketching rather than scaling. A rough sketch gives a vague sense of the room. A scaled plan — where 1 square on the grid equals a fixed real-world distance — gives everyone working from it the same information.
How a Single Measurement Mistake Ripples Through a Project
Imagine you're planning a kitchen renovation. You record your room as 4.2m (13ft 9in) wide, but the actual measurement is 3.9m (12ft 10in). That 30cm (12in) gap changes everything: the number of units that fit, the position of the appliances, whether a kitchen island is even possible.
Your fitter quotes based on your plan. The cabinets arrive. They don't fit. Someone has to go back and rework the layout — and that costs time and money that could have been saved with one careful measuring session and an accurate digital plan.
Precision at the start protects your budget at every stage that follows.
Manual vs. Digital: Which Method Produces a More Accurate Floor Plan?
Before you pick up a pencil or open a browser, it's worth understanding what each method actually delivers — because the gap between them is larger than most people expect.
Hand-Drawn Floor Plans: When Pencil and Paper Still Works
For a quick visual reference — something you'd sketch in a meeting or stick on a noticeboard — hand-drawn floor plans are fast and require nothing but graph paper and a pen.
The limitations are real, though:
- Scale is hard to maintain across a full drawing, especially when walls are long.
- Sharing a sketch means photographing it and hoping the other person can read your handwriting.
- Editing means starting over, or adding so many corrections the drawing becomes unreadable.
Some tools like Canva let you build a basic floor plan template — but they're graphic design tools, not measurement tools. There's no snap-to-grid, no live measurement display, and no way to confirm that what you've drawn reflects reality.
For a quick brainstorm, pencil and paper is fine. For anything you're going to hand to a professional, it falls short.
Digital Floor Plan Tools: What Changes When Measurements Snap to a Grid
A proper digital floor plan tool changes the accuracy equation entirely.
Instead of estimating where a wall ends on a piece of graph paper, you type in the measurement and the wall draws itself to scale. Every element — doors, windows, furniture, fixed features — sits on a grid where every square represents a fixed real-world distance.
The result is a plan where every measurement can be verified, every element is to scale, and the finished layout looks professional enough to send directly to a contractor or fitter without explanation.
Why Free Online Tools Close the Gap for Most Homeowners
Free floor plan software, no download required — that phrase matters more than it sounds. Removing the barrier of installation means you can start drawing the moment you finish measuring, on any device, without setting up an account or reading a manual.
Free Room Planner sits in this category. It's a floor plan maker free to use with no sign-up gate, built specifically for homeowners who need an accurate, shareable layout without the learning curve of traditional tools. The snap-to-grid feature and live measurement display do the precision work automatically, so you focus on the layout rather than the arithmetic.
For most renovation projects — kitchens, bathrooms, living rooms, home offices — this is the most practical method available, and it costs nothing.
What You Need Before You Start Drawing
The quality of your floor plan depends almost entirely on the quality of your measurements. Spend 15 minutes measuring carefully and the drawing takes care of itself. Rush the measuring, and no tool will save the result.
How to Measure a Room Accurately: The Right Sequence
Measure in this order every time:
- Start with the longest walls first. Measure wall-to-wall at floor level. Note the measurement in metres and centimetres (or feet and inches).
- Measure all four walls individually. Even in rooms that look square, opposite walls often differ by a few centimetres. Record each one separately.
- Mark door and window positions. Measure from the nearest corner to the edge of the door frame or window reveal. Then measure the width of the opening itself.
- Record the height of windows from the floor. This matters more for furniture placement near windows than for a basic floor plan, but it's worth capturing while you're in the room.
- Measure fixed features in place. Note the position and dimensions of radiators, built-in storage, and any fixed appliances. Measure their distance from the nearest corner so you can place them accurately on the plan.
Use a steel tape measure, not a fabric one — fabric stretches and introduces small errors that compound across a room. A laser distance measurer is even better for long walls; they're widely available and very accurate.
What to Record: Walls, Doors, Windows, Fixed Features
Before you start drawing, you should have written notes covering:
- Total dimensions of every wall
- Position and width of every door (and which way it swings)
- Position, width, and height of every window
- Location and approximate size of radiators and electrical sockets
- Any alcoves, chimney breasts, or irregular features that break the room's outline
- Positions of any plumbing points if you're planning a kitchen or bathroom
This list sounds long, but gathering it takes less than 20 minutes in most rooms. Having it all on paper before you open the tool means you won't need to go back and re-measure mid-drawing.
A Quick Note on Scale and What It Means in Practice
Scale means the relationship between the size of something on your plan and its real-world size. A scale of 1:50 means every 1cm on the drawing represents 50cm (about 20in) in real life.
When you draw digitally in a tool like Free Room Planner, scale is handled automatically. You type in real measurements and the tool draws to scale for you. But it's useful to understand the concept because it explains why a rough sketch — where you've guessed the proportions — gives such different results from a scaled plan.
A sofa that looks fine in a sketch can completely block a traffic route when drawn to its actual 2.2m (7ft 3in) length in a room that's only 3.8m (12ft 6in) wide.
How to Draw an Accurate Floor Plan Using Free Room Planner
This is the practical walkthrough. Follow these six steps and you'll go from a blank screen to a finished, dimensioned floor plan ready to share.
Step 1 — Open the Tool and Choose Your Room Type
Go to freeroomplanner.com. No sign-up. No download. The tool opens directly in your browser.
Choose the room type that matches your project — kitchen, bathroom, bedroom, living room, or a full multi-room layout. Each room type comes set up with the right starting point so you're not configuring anything from scratch.
Step 2 — Set Your Room Dimensions Using Live Measurements
Enter your wall measurements directly. The tool draws the room outline to scale based on the numbers you type. Watch the live measurement display as you work — it shows you the current dimension in real time, so you can confirm each wall before you move to the next one.
If your room has an irregular shape — an L-shape, a bay, or an alcove — add those features wall by wall. The tool handles non-rectangular rooms without any special setup.
Step 3 — Add Walls, Doors, and Windows With Snap-to-Grid Precision
This is where snap-to-grid earns its place. Every element you add — walls, door openings, window positions — locks to the grid automatically. That means you physically cannot place a wall slightly off-centre or accidentally leave a gap between two sections that should connect.
Accuracy tip: When placing doors, pay attention to the swing direction — the tool shows the arc the door travels as it opens. If that arc overlaps a piece of furniture or a major walkway, you'll see the problem on screen before it becomes a problem on site. This single check prevents one of the most frequent floor plan mistakes homeowners make.
Add each door and window using the measurements you recorded. Set the opening width and position from the corner, and the tool places it precisely.
Step 4 — Place Furniture and Fixed Features to Check Real-World Fit
With your room shell drawn, start adding furniture and fixed features from the tool's library. Every item in the library has real-world dimensions attached to it, so a standard double bed placed on your plan is actually 135cm × 190cm (4ft 5in × 6ft 3in) — not an approximate blob.
Drag items into position and watch the live measurements update as you move them. This is how you confirm whether a sofa fits along a wall, whether a dining table leaves enough room to pull out chairs, or whether a kitchen island creates a clearance problem.
For room layout ideas in small spaces especially, this step often changes the plan entirely — things that seemed possible in your head don't work at true scale, and you find that out before anything gets moved or installed.
Step 5 — Review Measurements and Adjust Before You Export
Before you export anything, do a final check:
- Read the dimension labels on every wall and confirm they match your written measurements.
- Check that all doors and windows are positioned correctly from their reference corners.
- Confirm that furniture clearances make practical sense — can someone walk between the bed and the wardrobe? Does the bathroom door open without hitting the toilet?
- Check that fixed services (radiators, sockets, plumbing points) are shown in the right positions.
This takes five minutes. It's the equivalent of measuring twice before you cut.
Step 6 — Export and Share Your Floor Plan With a Contractor or Designer
When the plan looks right, export it as a clean PNG image. The export includes all dimensions and labels, so the person receiving it has everything they need without you needing to explain the drawing.
Send it by email, drop it into a WhatsApp message, or add it to a shared folder. Your contractor, fitter, or designer gets a clear, scaled layout they can work from immediately.
Getting the Most Out of Snap-to-Grid and Live Measurements
These two features are what separate a digital floor plan tool from a graphic design template or a hand sketch. Understanding how they work helps you use them deliberately.
What Snap-to-Grid Does and Why It Prevents the Most Frequent Errors
Snap-to-grid means every element you place aligns to the nearest grid point automatically. In Free Room Planner, the grid is set at 10cm (4in) intervals.
That matters because most measurement errors in floor plans don't come from wildly wrong numbers — they come from small misalignments that add up. A wall that's drawn 5cm short, a door frame positioned 8cm from where it actually sits, a window that's 3cm wider than recorded. Individually, each error is tiny. Combined, they produce a plan that nobody can trust.
Snap-to-grid removes those small errors entirely. Every wall, door, and window sits on a grid point, which means the geometry of the plan is always internally consistent.
Reading Live Measurements as You Draw: What to Watch For
The live measurement display updates in real time as you draw and move elements. Get into the habit of reading it — not just glancing at it.
Things to watch:
- Wall length as you draw it. Confirm it matches your recorded measurement before you release.
- Gap between elements. When you're placing furniture, the display tells you the clearance between pieces — useful for checking that a 90cm (3ft) kitchen walkway doesn't shrink below the recommended 75cm (2ft 6in) minimum.
- Room total. As you add internal walls or partitions, confirm the subdivided spaces add up to the room total you started with.
The live display is your real-time accuracy check. Use it constantly.
Room-Specific Tips for Common Renovation Projects
Kitchen Floor Plans: Clearances, Appliance Zones, and the Work Triangle
Kitchen planning has more constraints than any other room type. Clearances between counters, appliance placement, and workflow all interact.
The work triangle — the path between your hob, sink, and fridge — should total between 3.6m and 6.7m (12ft and 22ft) for efficient use. On a scaled floor plan, you can measure this path directly and adjust appliance positions before anything gets installed.
Minimum clearances to build into your plan:
- Between facing counters: 90cm (3ft) absolute minimum, 120cm (4ft) preferred if two people cook.
- In front of appliances that open outward: 90cm (3ft) in front of an oven door, fridge, or dishwasher.
- Kitchen island clearance: 90cm (3ft) on all working sides.
For a full guide to kitchen layout planning, see our kitchen renovation planning guide.
Bathroom Floor Plans: Fixtures, Door Swing, and Minimum Clearances
Bathrooms are where door swing causes the most problems. In a small bathroom, a door that opens inward can make the entire room impractical — you can't open it if someone's standing at the sink.
Minimum clearances for bathrooms:
- In front of a toilet: 60cm (2ft) from the front of the pan to the nearest wall or fixture.
- Beside a toilet: 20cm (8in) minimum on each side, though 25cm (10in) is more comfortable.
- In front of a basin: 70cm (2ft 4in) of clear floor space.
- Shower or bath door swing: must clear all other fixtures.
If you're working with a small bathroom layout — say 1.8m × 2.4m (6ft × 8ft) — a free online bathroom planner lets you try different fixture arrangements before you commit to any plumbing changes. Draw it first.
Living Room and Open-Plan Layouts: Furniture Scale and Traffic Flow
The most common living room mistake isn't choosing the wrong furniture — it's choosing the right furniture in the wrong size. A sofa that looks proportionate in a showroom can overwhelm a 4m × 3.5m (13ft × 11ft 6in) room.
On a scaled floor plan, you can also map traffic routes — the paths people walk between the entrance, seating area, and kitchen in an open-plan space. A route that's less than 75cm (2ft 6in) wide feels cramped and inconvenient in daily use.
For open-plan spaces specifically, see our open-plan kitchen living room layout guide, which covers the particular challenges of combining two room functions in one scaled plan.
If you're working with a home office within a larger room, the home office layout planning guide covers how to carve out a functional workspace without the room feeling divided.
How to Share Your Floor Plan With a Contractor or Designer
Drawing the plan is half the job. Getting it into the right hands in the right format is the other half.
What File Format to Export and Why It Matters
Free Room Planner exports your floor plan as a clean PNG image. PNG is the right format for this purpose:
- It's universally readable — no special software needed.
- It preserves sharp edges and text labels at high resolution.
- It attaches cleanly to emails and messages without compression artefacts.
If a contractor asks for a PDF, you can convert a PNG to PDF using any free online tool in under a minute — or simply print the PNG to PDF from your browser.
What to Annotate Before You Send
The exported image includes your dimensions. But before you send it, add any context the drawing can't show:
- Which direction is north (if relevant to natural light discussions).
- The location of the main entry point to the room.
- Any features that aren't shown: ceiling height, floor surface, existing services you plan to keep.
- Notes on which elements are existing and which are proposed changes.
You can add these notes directly on the image using any basic photo editor, or simply write them in the email you send with the attachment.
How Contractors and Fitters Typically Use a Floor Plan You Provide
A contractor working from your plan will use it to:
- Check whether the layout you've described is physically possible in the space.
- Calculate the linear metres of units or materials required.
- Identify potential problems — a service location that conflicts with the proposed layout, a door swing that blocks workflow — before work starts.
- Price the job more accurately, because guesswork is reduced.
A clear, dimensioned plan saves time at the quoting stage and reduces the risk of surprises on installation day. That's a direct financial benefit to you.
Common Floor Plan Mistakes to Avoid
Even with a digital tool doing the scaling work, these errors show up regularly. Know them, and you'll avoid them.
Measuring to the Wrong Surface
Always measure to the bare wall, not to skirting boards or wall cladding. Skirting boards are typically 1.5–2cm (about ¾in) thick — small enough to ignore until you're trying to fit a unit flush against the wall and it won't close properly.
If your room has thick plastered walls, tiled splashbacks, or wall panelling, record the finished surface measurement and note it separately from the structural wall measurement.
Forgetting Door and Window Swing Clearance
This one is so common it deserves its own callout. A door needs clear floor space to swing open. If furniture sits in that arc, the door won't open fully — or at all.
In Free Room Planner, the door swing arc is shown on the plan as you place it. Use it. If the arc hits a wardrobe, a sofa, or a kitchen unit, you've found the problem before it exists on site.
Windows that open inward have the same issue — don't place furniture directly below or beside them without checking the opening direction.
Ignoring Fixed Services: Radiators, Sockets, and Plumbing Points
Fixed services limit where you can put things. A radiator can't move without a plumber. A soil stack can't relocate without significant cost. An electrical socket can be extended, but it adds to the budget.
Mark every fixed service on your plan before you start arranging furniture or fixtures. That way, any conflicts between your proposed layout and the room's existing infrastructure show up on screen — not after installation has started.
Skipping a Second Measurement Check Before You Export
Measure twice, draw once. Before you export your finished plan, go back to your written measurements and compare them to every wall dimension shown on screen.
This takes four minutes. It catches transposition errors (typing 3.8m when you meant 3.6m), unit mix-ups, and features placed from the wrong reference corner. It's the step most people skip. Don't.
Conclusion and Next Step
An accurate floor plan does one thing better than anything else: it puts everyone working on your project on the same page before anyone spends a penny.
Drawing one used to take specialist skills and expensive software. Free Room Planner removes both barriers. It's free, it runs in your browser, and it requires no sign-up or download. Most homeowners produce a finished, shareable layout in under 20 minutes — a layout that includes real dimensions, accurate furniture placement, and all the detail a contractor, fitter, or designer needs to work from.
Start your floor plan now — no sign-up needed
If you're planning a kitchen renovation, the kitchen renovation planning guide takes you from floor plan to full project brief. For open-plan spaces or living room layouts, the furniture arrangement tool helps you test different configurations before committing to a single layout.